WARNING: This guide does not apply to people in the EU who own iPhone 15 Pro and above. If you are one of these device owners, it will be sufficient if you update your software to iOS 18.1 and set up your phone according to the “Last Step — Activating Apple Intelligence” section of the article (scroll all the way down).
First of all, if you haven’t updated your iOS to version 18.0.1, you can skip this section again and go straight to the “Beta IPSW” section below.
However, those of you who have the latest version of your iPhone need to approach this a bit differently. That’s because in order to run Apple Intelligence, we need to have a beta version of the iOS operating system (specifically 18.1 beta 4) on our iPhone. To put something like this on your phone, you simply download the beta IPSW file, plug your iPhone in with a cable to your Mac, click “Check for Update” while pressing the Option Key, select the beta IPSW file, the phone reboots, the beta boots, and you’re done.
(If you don’t know what an IPSW is, it’s short for a kind of firmware file used on Apple devices to install or update their operating system.)
However, if you have an updated iPhone, “check for update” along with the Option Key won’t let you boot some beta IPSW file (because Apple sees no reason in allowing you to update something when you already have the latest version downloaded).
No fear. This situation can be resolved by downgrading your phone first. Choose the IPSW you want according to the device you have and download it on this page. I recommend downloading only signed IPSWs (at the time of writing this article, this is e.g. iOS 17.7).
However, before you decide to do anything, it will be necessary to BACK UP YOUR PHONE!!! Uploading a new IPSW file will do a factory reset on your phone and unless you want to lose all your data, a backup will be essential.
Once you have the file downloaded, connect your !BACKED UP! iPhone to your Mac, press the Option Key, and click the “Restore iPhone” button at the same time. Select your iOS downgrade IPSW file and upload it. Your phone will then reboot and wake up with the new downgrade already in it, which you can use next.
Beta IPSW
However, on such a phone with an old version of iOS, you must download version 18.1 beta 4 to use Apple Intelligence at all. You can choose the IPSW beta file based on the device you own and download it from this page.
Whether your phone is un-upgraded or downgraded — again, as a reminder — if you have any data on it that you don’t want to lose, it will be imperative that you BACK IT UP first!!!
An un-upgraded phone will already allow us to update it with the experimental beta. We connect the iPhone to the Mac, press the Option Key while we click on “Check for Update”, select the IPSW file with the beta and upload it. The phone will then reboot and wake up with the beta already applied to Apple Intelligence.
Required applications
At this point, we need to install two programs on your computer — misakaX and Nugget, which will allow us to modify certain settings on our phone so that we can run Apple Intelligence on it.
PList File
The next step is to download the PList file to your iPhone or iPad. PList is a file format used in Apple operating systems to store structured data in a serialized form — these files typically contain data such as settings, configuration preferences, or application information. Editing this file will understandably help us convince Apple that our old device is an Apple Intelligence-enabled device.
The procedure looks like this:
- Find the link to download the PList file
- Open the downloaded file in the Shortcuts application
- Save the file on your phone
- Move the saved file (e.g. via Airdrop) to your computer you will be working with (the computer you have Nugget/misakaX on)
At this point we can finally get to the actual editing of the PList file. Open it (I recommend VSCodium) and press Ctrl+F/Command+F to find the string h9jDsbgj7xIVeIQ8S3/X3Q. Immediately below it should be the identification of the device from which the PList originated (e.g. <string>iPhone15,2</string>). Overwrite this string and replace it with the string iPhone16,2. The result will look something like this: <string>iPhone16,2</string>.
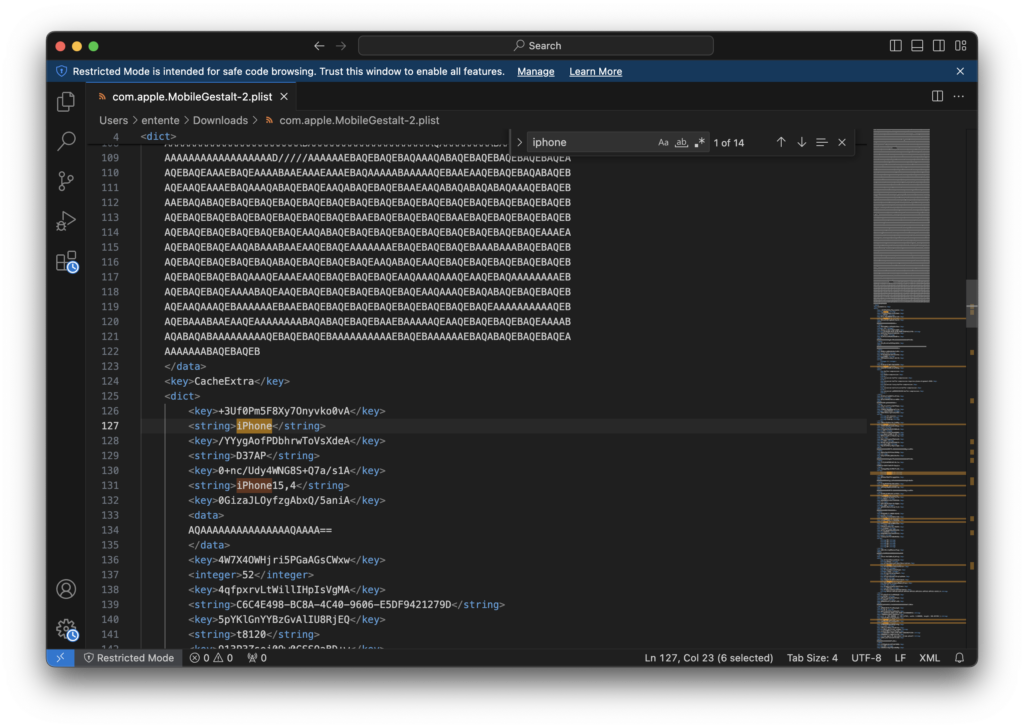
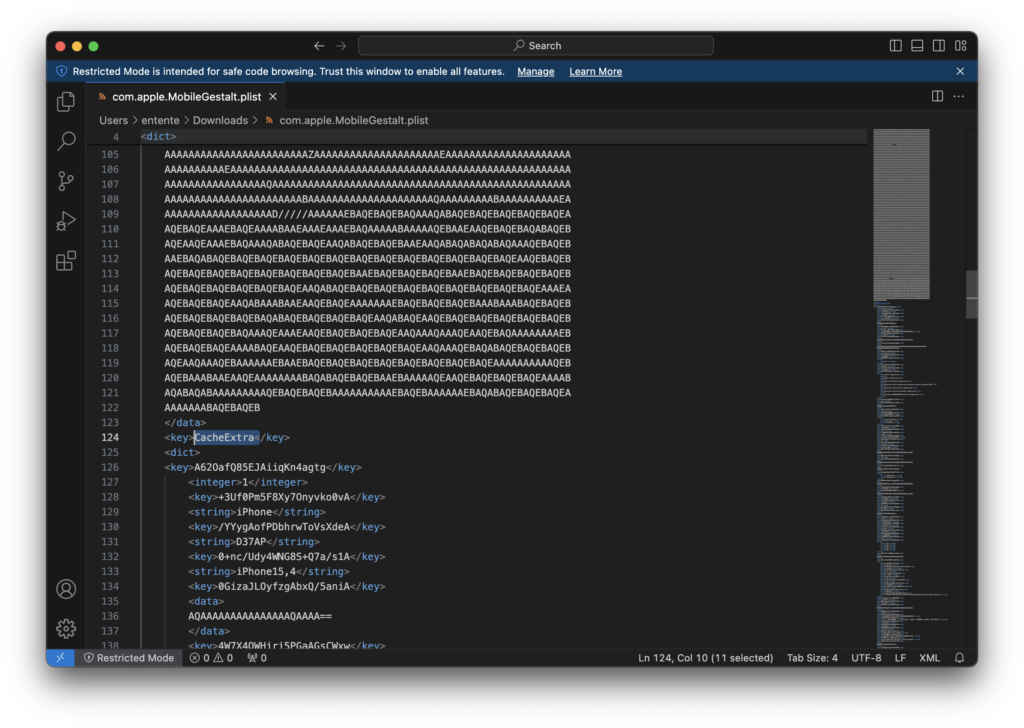
Next, we find these two lines in the PList:
<key>CacheExtra</key>
<dict>
Add the following two lines immediately below them:
<key>A62OafQ85EJAiiqKn4agtg</key>
<integer>1</integer>
The indentation doesn’t matter, but ideally it should look like the screenshot below. We can save and close the edited PList.
Apple Intelligence and Nugget
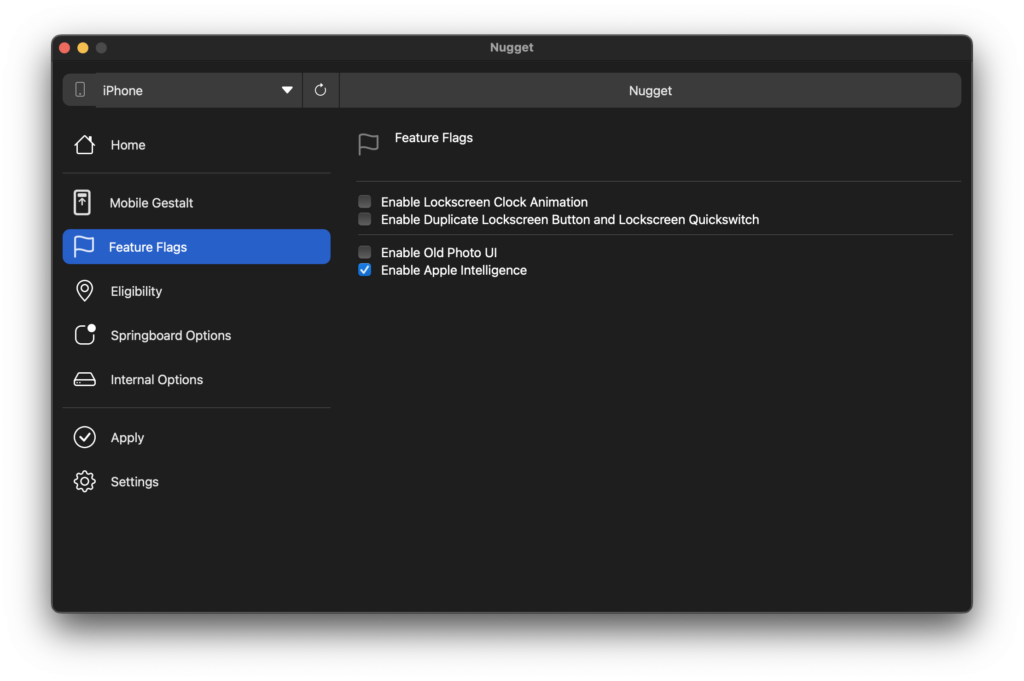
Now when we have the edited PList File, it’s time to put it into our device as well. For this we will use the Nugget application and the installation process will be as follows:
- Open the Nugget app on your computer
- Go to Feature Flags
- Enable the option for Apple Intelligence
- Go to the “Apply” section to upload your edited PList file
- Your device will reboot and apply all changes
Apple Intelligence and misakaX
We practically used the Nugget tool to decrypt or modify protected system files, such as the PList file, bypassing Apple’s cryptographic protections that usually prevent such changes. Thanks to Nugget, we were able to make the necessary modifications at all.
Beyond that, however, we also need a specific exploit to guarantee that the modifications we made with Nugget remain available even after a reboot or update. And that’s what misakaX is for.
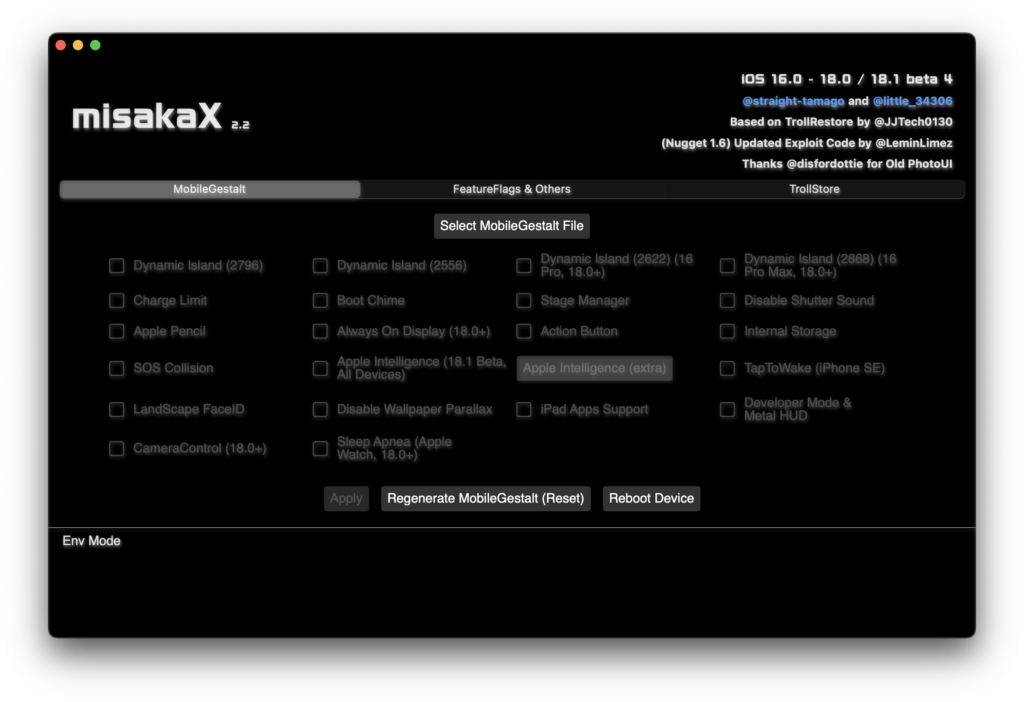
Once our device is rebooted, we’ll still leave it connected to our computer, open misakaX, and the procedure will be as follows:
- Click on the “Select MobileGestalt File” button
- Select the edited PList file (the same one you uploaded to Nugget)
- Check the “Apple Intelligence” and “Apple Intelligence (extra)” option that are right next to each other in the row
- Your device will reboot again and apply all the changes
Last Step — Activating Apple Intelligence
If you’ve made it this far, congratulations. A new “Apple Intelligence & Siri” section successfully lights up in your phone’s Settings, but when you tap it, you get a nasty text that says something about how Apple Intelligence won’t work in your region. You’ll have to change some of your personal information to make it work.
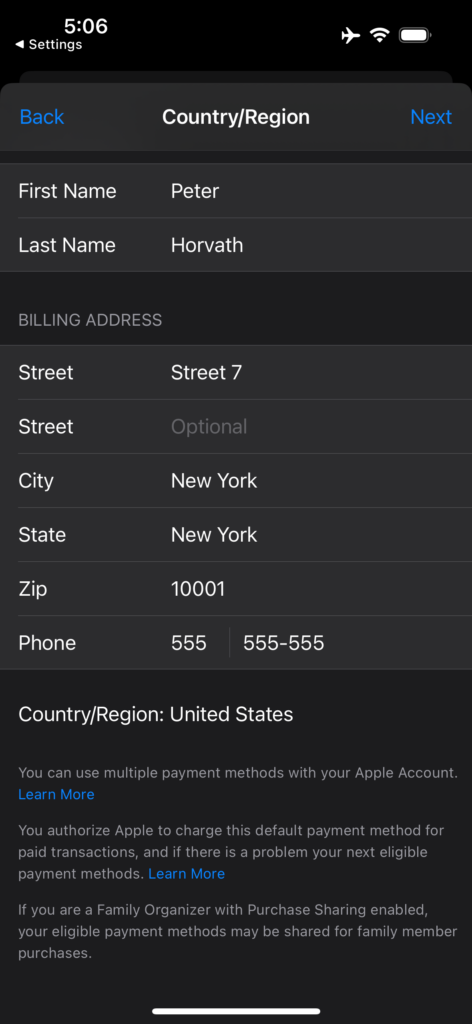
Go to your Settings and click on your name. In the “Media and Purchases” box, you’ll need to change the country and data associated with your AppleID (understandably, this needs to be changed to the US). At this point, it’s important to note that if you currently have any active subscriptions on your Apple account, it won’t be possible for you to change any data. You will therefore need to cancel any active subscriptions first, and then delete the payment card associated with it from your Apple account (if you are using a US-issued payment card, feel free to leave it there). However, your Apple account will still work without the card.
If you’re going to be filling out a “Billing Address”, no worries — you can fill in random things in the spreadsheet, much like I did in the screenshot below.
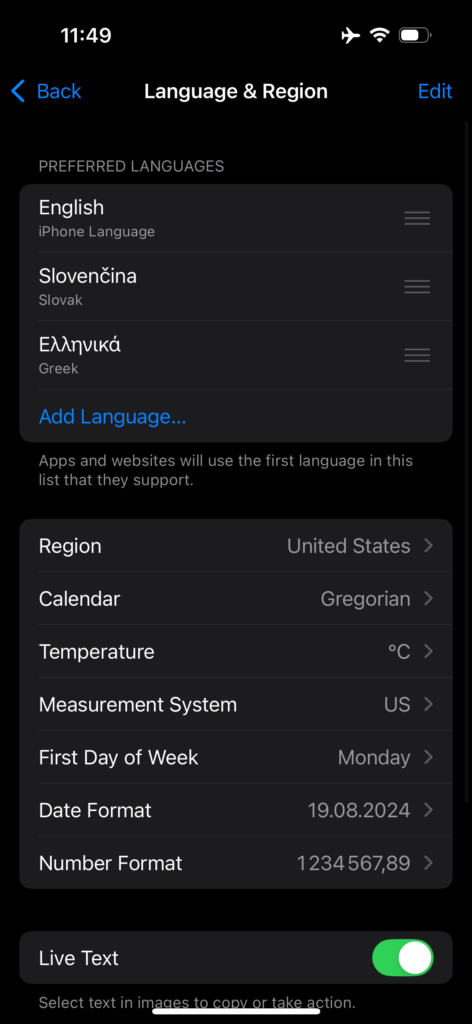
Apple Intelligence still won’t work, though. If you tap it, you can see that it’ll throw up a warning about “not available unless you’re using English as the default language on your phone”. You therefore need to change the other data. So go to Settings and click on the “Language & Region Settings” box. Firstly, you need to change your current region you are in to “USA” and secondly you also need to set the iPhone Language to “English (US)”:
If you’re all set up, congratulations, Apple Intelligence is fully available to you. Just open it, click “Join Waitlist” and wait. It usually takes a few minutes to a couple of hours to join Waitlist.
